Welcome!
This is a step-by-step tutorial on how to draw a pug!
The Inspiration
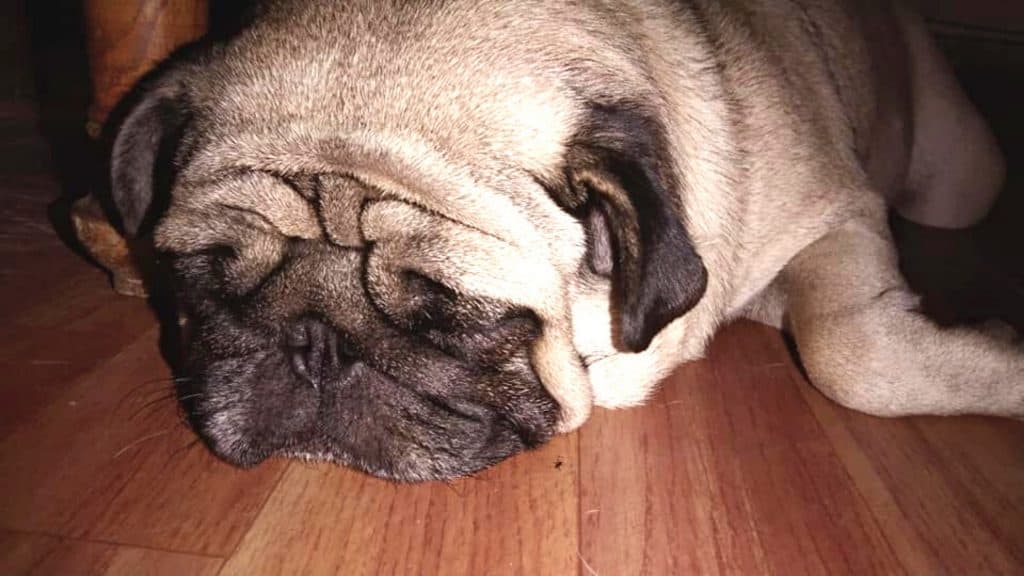
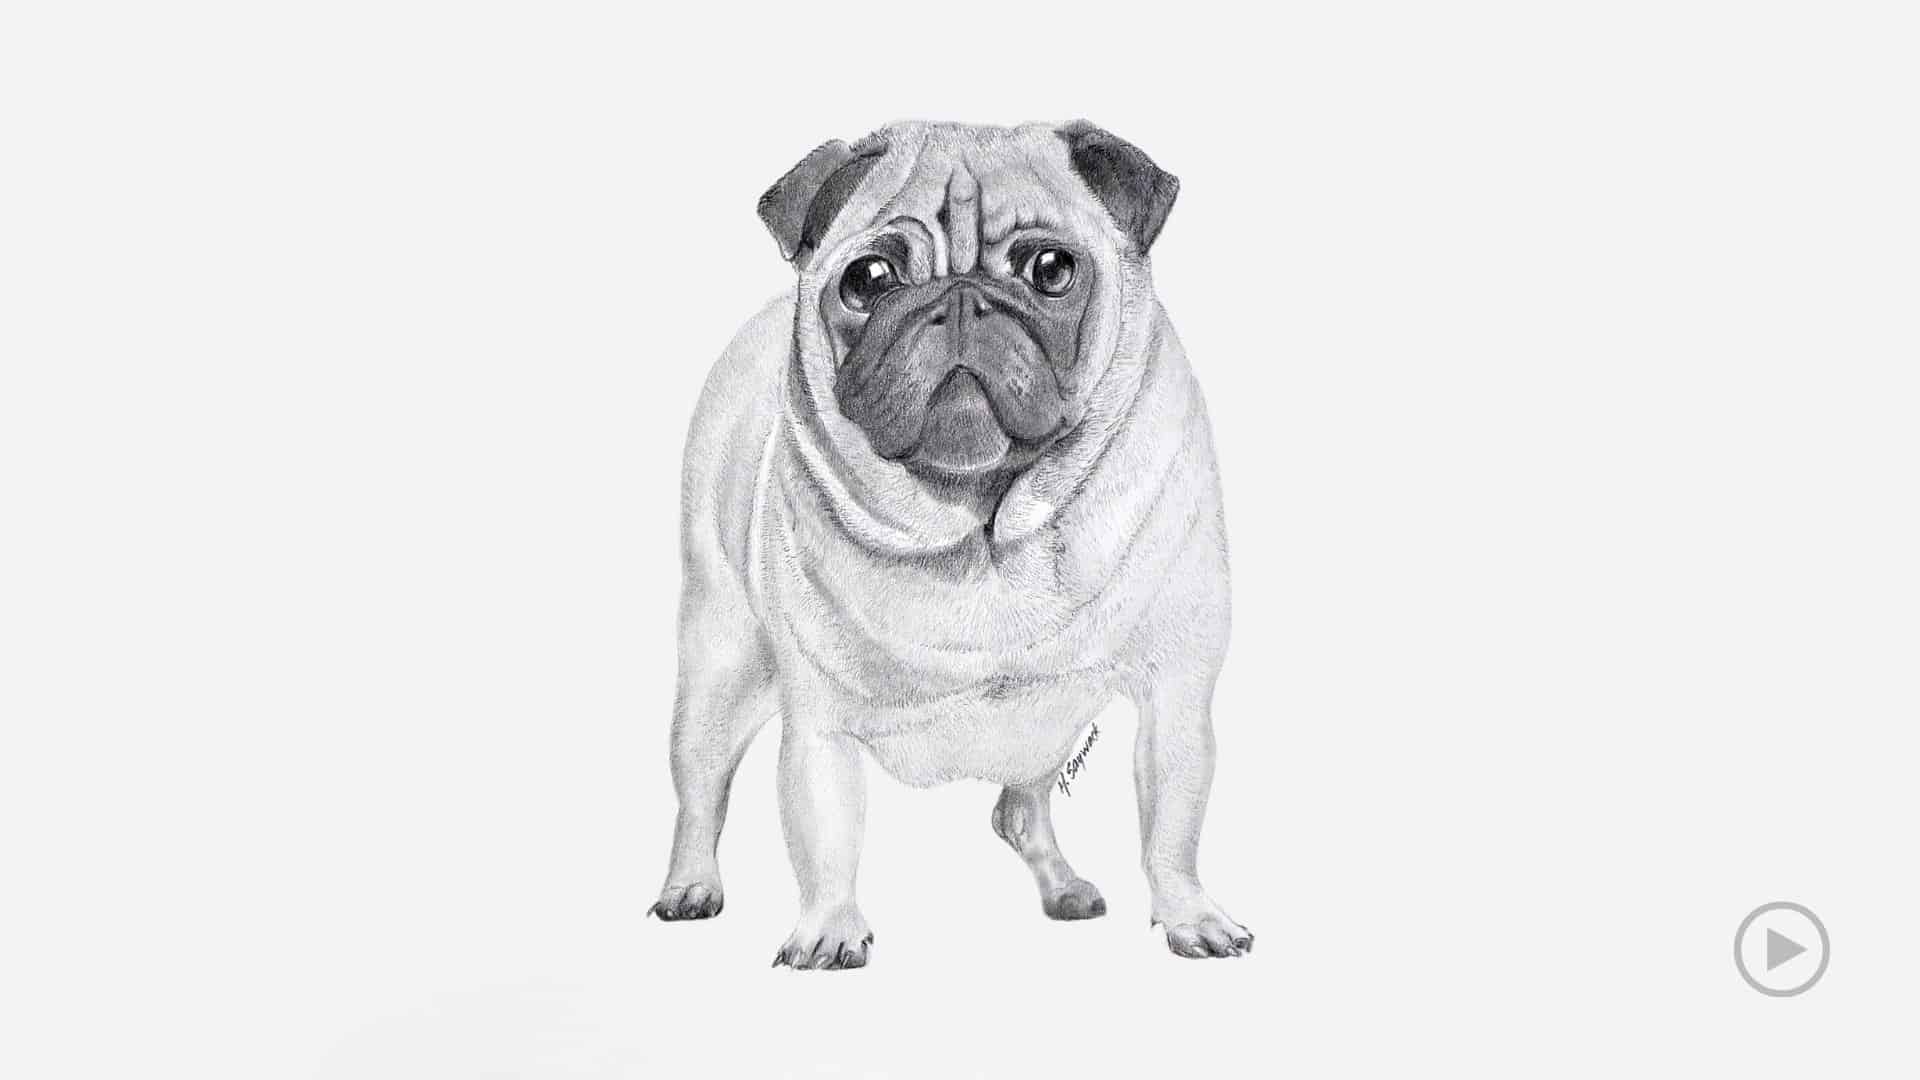
This perfect little puppy pug is named Norah. She belongs to my cousin who asked if I would do a drawing of her. My cousin and Norah live on the other side of the world, so I haven’t met her yet, but this dog has a chill little soul. She is definitely spoiled by her family based on the photos and videos I’ve seen!
Norah likes cuddling on the couch, playing with my nephew, and long evening walks where she just might fall asleep and have to be carried home like the pug princess she is. Drawing this puppy was so much fun and much simpler than it might seem.
If you want to learn how to draw a pug dog, this was also my first pug drawing and tutorial, so let’s try this together!
Basic Drawing Tools
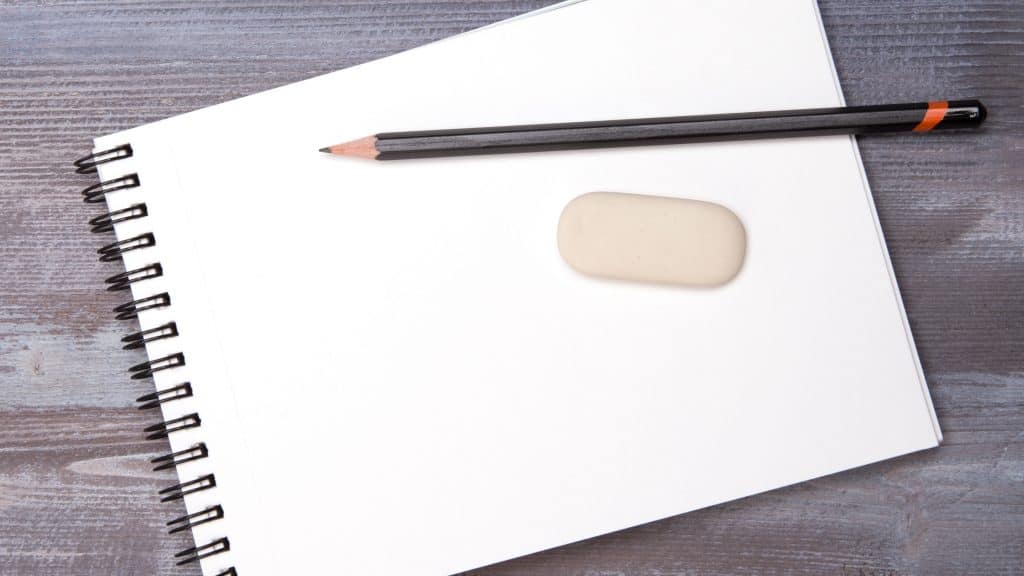
If you’re a beginner like I was not too long ago, you will need a few basics.
What You Need:
- paper
- a medium pencil (one that can shade dark but doesn’t get dull too quickly)
- eraser
- blender
Also, work on a solid surface. Don’t draw on your lap. It’s bad for your posture!
Here’s a little more information on drawing tools:
Pencils

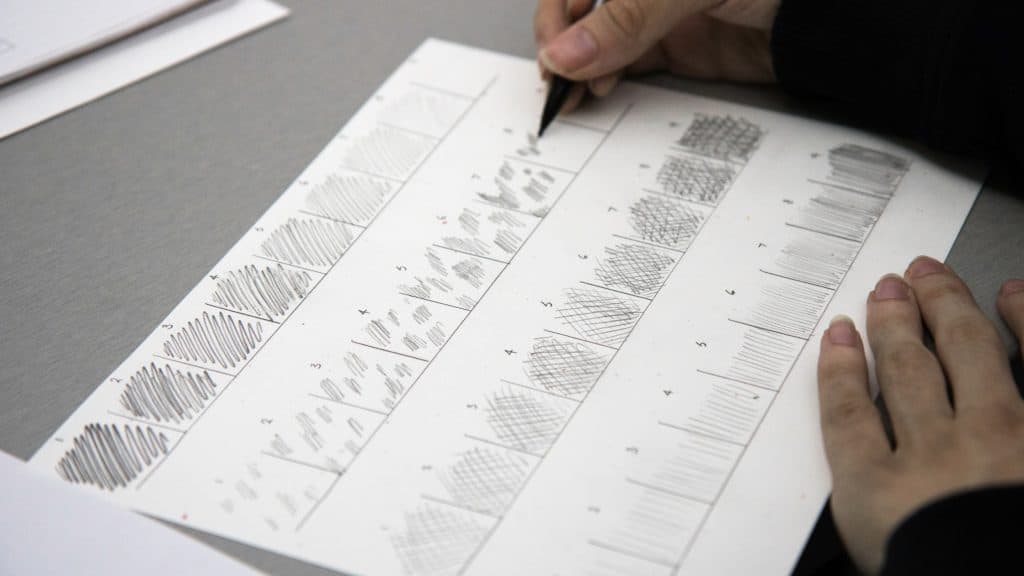
Pencils are rated by how sharp and hard or how soft and dark the graphite is.
An H pencil has hard graphite, and it will keep a sharp point for fine lines and writing.
A soft graphite or B pencil will give you nice, dark lines, but the point will wear down or dull easily.
The higher the number before the H or B, the lighter or darker the lead.
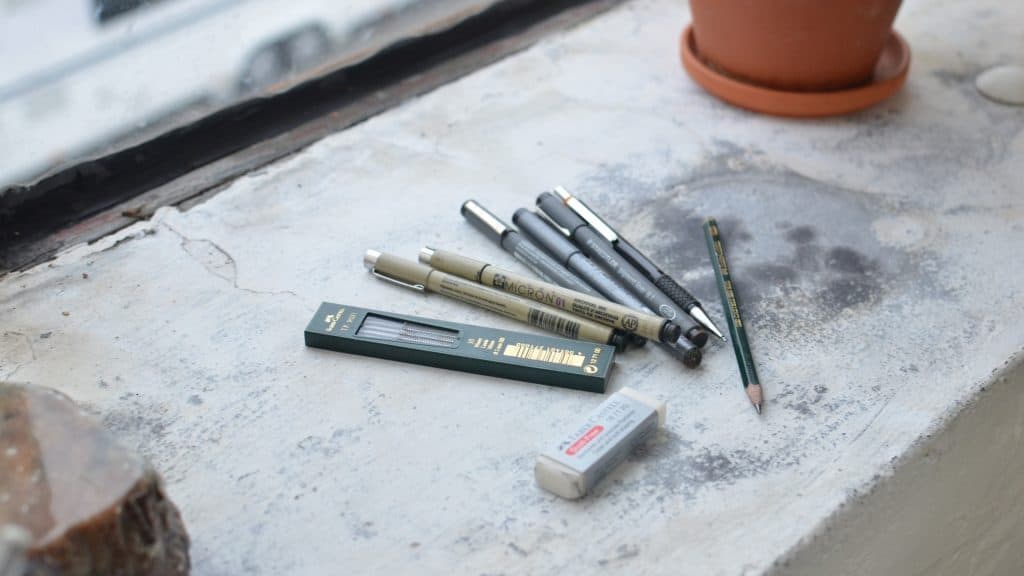
If you do have a budget, Blackwing 602 pencils are what I use. Blackwing pencils have special Japanese graphite that lets you do everything from sharp lines to deep, dark shading, all with one pencil. For a homeschooling mom like me, that’s one less thing to think about.
That said, you don’t need a special pencil to begin drawing. Whatever you have on hand, pick it up and try a sketch. It is the best way to learn as you go.
Paper
What kind of paper do you need for a pencil sketch/drawing? Honestly, I’ve used anything from printer paper to simple sketch pads to high-end paper.
If you want something a little better quality, Strathmore is a great economical option with lots of different weights and sizes to choose from. For pencil drawing, you want to go with smooth paper as opposed to textured.
The quality of the paper does enhance the look and feel of your artwork, but don’t let that stop you. Any paper will do to get you started.
Tortillion
A tortillion is the fancy name for a blending stump. It’s really just a cylinder of tightly rolled paper. I like a blending stick because it will pick up “color” or graphite. This makes shading so easy and fun! You can even use it to shade other areas, as you will see in the video.
If you don’t own one of these, there are simpler options you can try, which I’ll share later on. So, stay with me!
Eraser
An eraser is a very versatile tool! There are all kinds of erasers you can try.
Kneadable erasers can be molded like playdoh depending on what you need. You can add texture to a kneadable eraser, like this one by Faber Castell, and roll it across your shaded areas to create inverse texture.
Try an eraser pen, like the Mono Zero by Tombow, for fine areas like whiskers on a cat or those tiny highlights. This model comes with a couple extra replacements erasers. The stiff rubber nibs are great for clean outlines and sharp highlights.
Also, if you have a latex allergy, polymer erasers may give you the same results without the skin reaction! If one doesn’t work for you, try other brands like I did. You’ll find one that’s right for you.
And, there’s one more thing…
Reference: Is it ok to draw from a photo?
Now, some will tell you a “real” artist does not draw from reference, but the idea of being an artist already defies the notion of rules. Even if an artist draws from a picture or photo, they will inevitably put their own stamp on any piece of art they produce.
Like a fingerprint that is unique to each human being, every artist has their own signature style. Just don’t copy someone else’s work. That’s not cool or necessary.
I’ve learned from drawing live subjects that children and animals do not stay put, at least not long enough. Unless they are asleep. For me, the easiest solution is to draw from a reference.
Often, I use several photos (with permission) of the subject in different positions/angles to create my own desired composition. That way, I still get creative, and I have good references to capture unique features. So, I say pick a photo (or many) and go from there.

I do whatever it takes to get the most value out of my short in-between-kid’s-schedules time slots. It also helps to scan photos into my computer and make them grayscale for my pencil drawings (you don’t have to do this).
Now that we have everything we need, it’s time to draw! I’ve included the timestamps from the above video so you can slow the video down and follow along or just try it on your own. Either way, have fun!
And, just as a side note - this is also my first art step-tutorial ever!
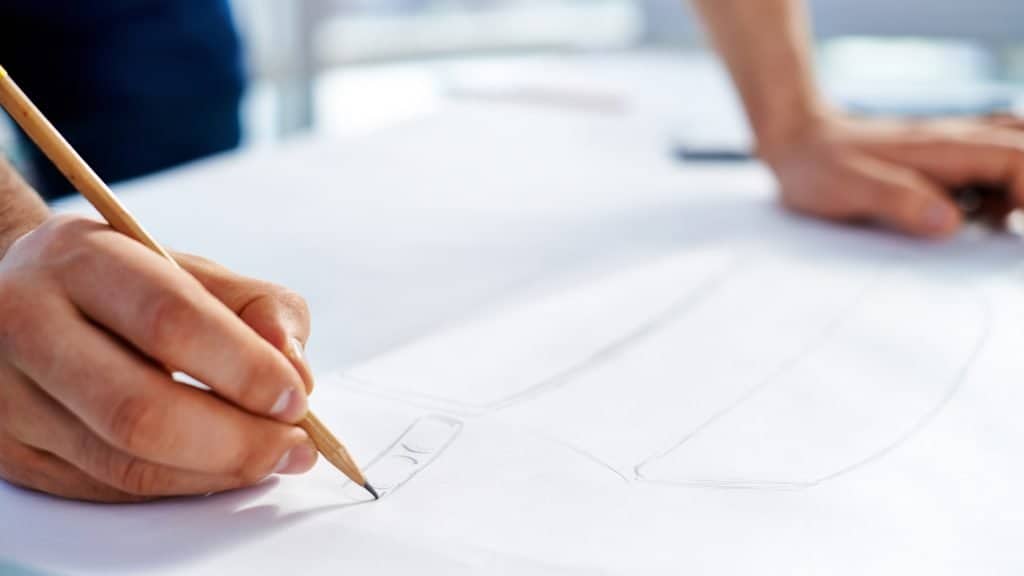
How to Draw A Pug Step 1 – Outline

For our pug drawing, we are going to start with an outline using very light strokes. It’s as simple as that. I learned drawing pretty much on my own, so I have a method that works for me. You can find every kind of drawing tutorial out there, and learn really cool techniques from different artists, so try as many as possible.
The first step is to find the center of your page. You can also draw light guidelines. Now, find the center of your subject. The pug’s body is short and stocky, so the head/face will land a little above the centerline, the torso in the middle, and the legs in the lower portion of the page.
If this is your first time, don’t worry too much about the placement of your drawing. You’ll get the hang of it as you practice.
Symmetrical Features
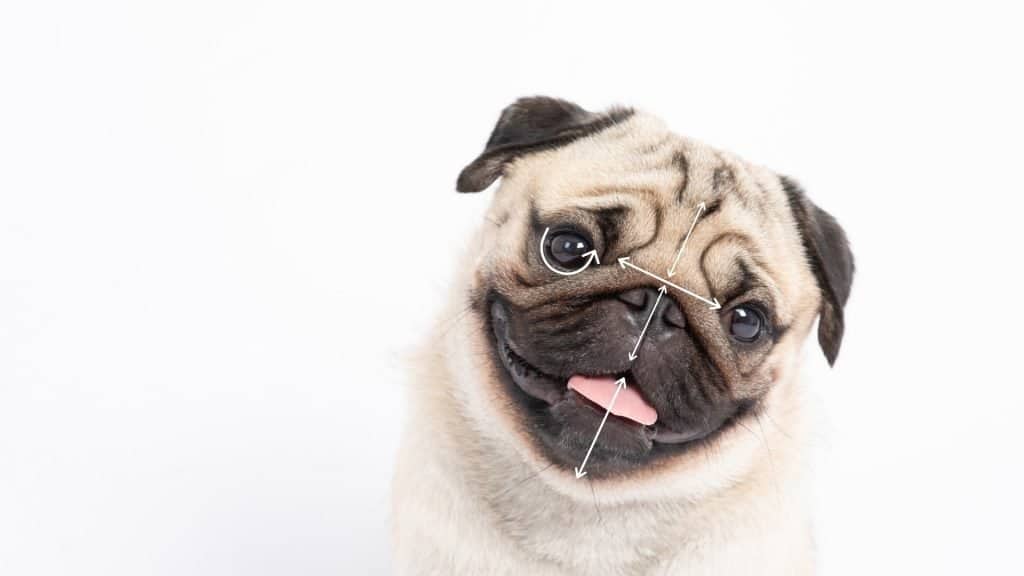
Next, I like to begin with the face. It’s pretty symmetrical. If you can visualize a line down the middle of that pug dog face, start there. Since this will be a quick sketch of the details, you can eyeball the distance from this centerline to each…eyeball.
Almost too easy.
Keep in mind that an eyeball is a sphere and not a flat circle. That means each highlight on the surface of the eye will also be curved.
Remember to sketch lightly so you can erase if you have to.
From the eyes, you can move down to the nose, folds of the chin, up to the forehead, and out to the ears. Measure the space between each new object or shape as you go.
Outline Shade Variations

I also find it helpful to outline the differently shaded areas. The video might do a better job of explaining this. The forehead wrinkles, for example, are really just fine lines with a darker background. Outline those areas in preparation for shading them.
When you have a basic outline of the pug’s head, you can add the pug’s body and legs. If it looks like a cartoon pug, you’re on the right track.
We are about to turn a simple line drawing into a 3-dimensional fur baby so, stay with me.
Time for some details!
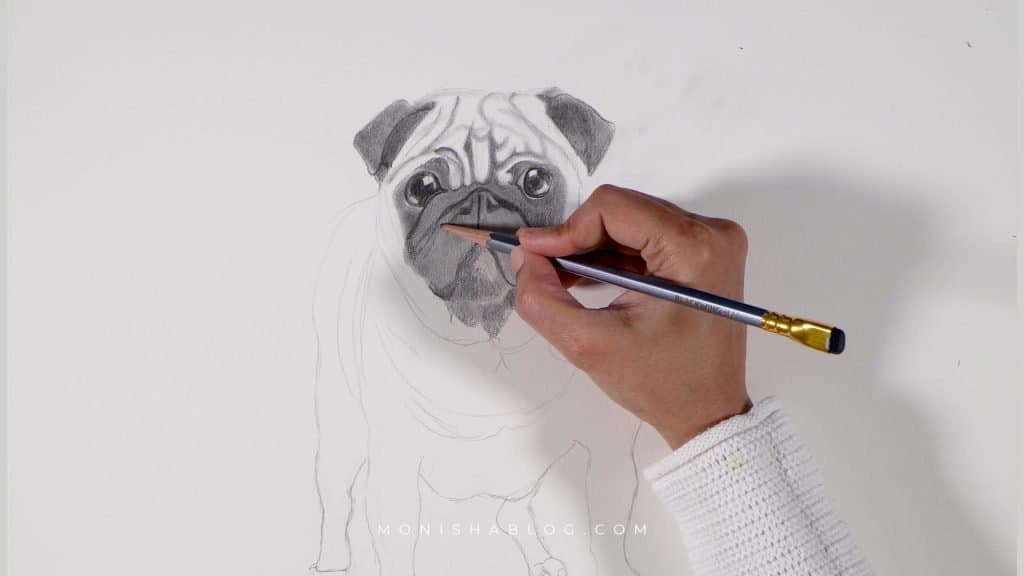
How to Draw A Pug Step 2 – The Eyes Have It!
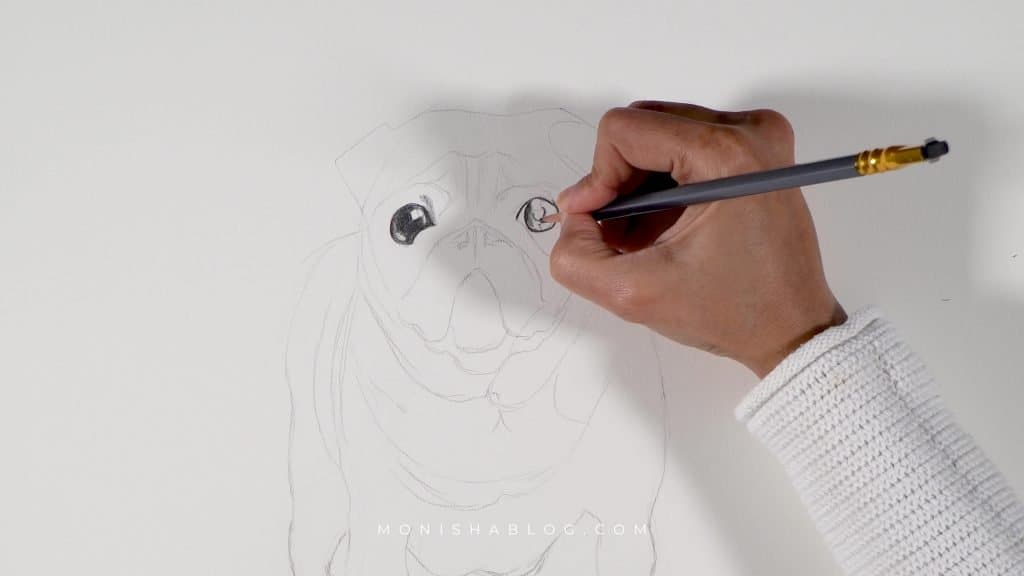
Next, we’re going to fill in the eyes. Begin by darkening the outline of each eye. Make sure you’ve blocked out the areas of the pug’s body you want to stay white or light, and don’t shade those in.
Remember to keep referring to your photo for details.
The eyes are the most important creature feature. Whether you are drawing people or animals – even insects – you want to get the eye shape as close to the subject’s as possible.
If one eye seems a little bigger or smaller, let it be! Those quirky details make each living thing unique and are very important if you want to capture them well.
Have you noticed how a pug’s eyes are slightly off to either side? That means the light reflected in them will also not be reflected symmetrically. That’s okay. Capturing that will give you those characteristic pug dog eyes.
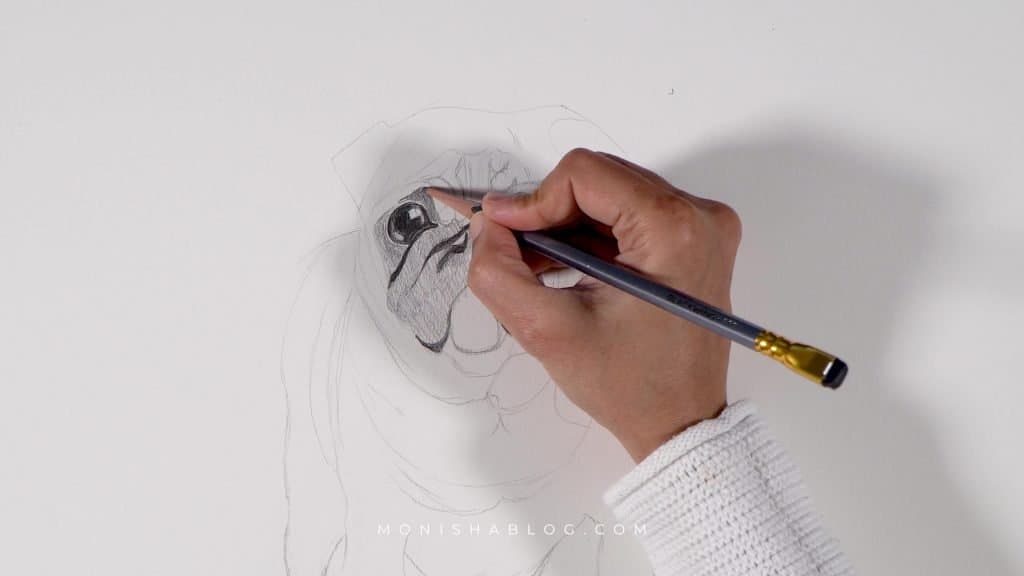
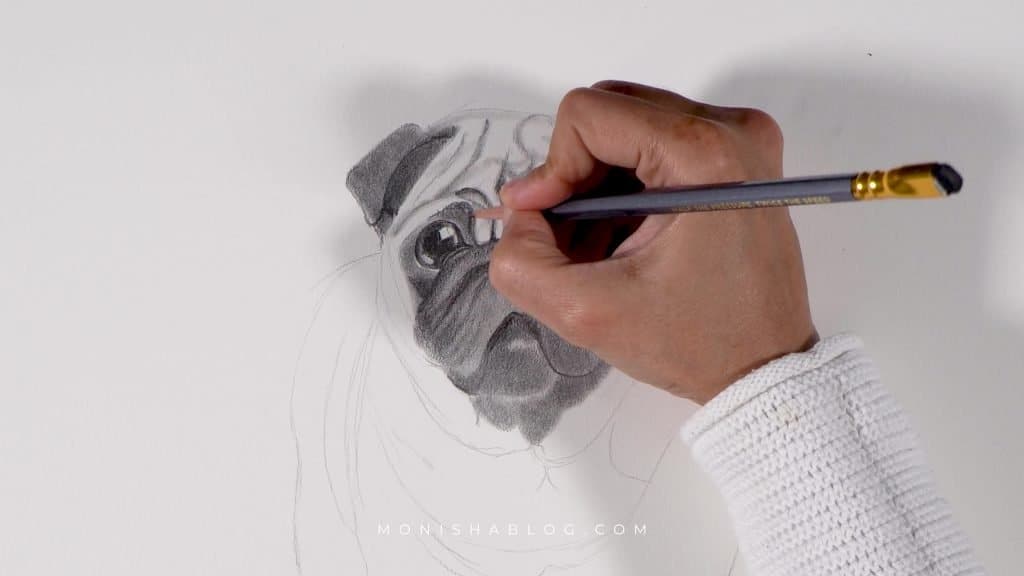
How to Draw A Pug Step 3 – Filling In
Now that the eyes are filled in, I find it helps me connect to what I am trying to capture. It’s almost like we can talk to and get to know each other.
If that’s a little weird, no worries. Let’s just move on to filling in the outlines.
Norah’s dark patches are mostly on the face with a little bit on the paws and ears. I like to visually break up the dark and light areas into shapes and “color” those with the depth of color I want. Do you see a circular dark area? Shade a circle in that spot. If you see two tiny triangles for nostrils, shade those in with the depth of color you see.
Remember, you don’t have to get it perfect because we will blend it in a moment anyway. The filling in and shading is kind of like a foundation color layer that we are adding underneath. This will help make the details pop! Think of it as the “depth of field” setting that blurs the background of a photo so that the foreground details look extra sharp.
If your portrait now looks a little like a cute dog emoji pug, you are doing great! Now that we have the dark areas filled in let’s start shading in bigger areas.
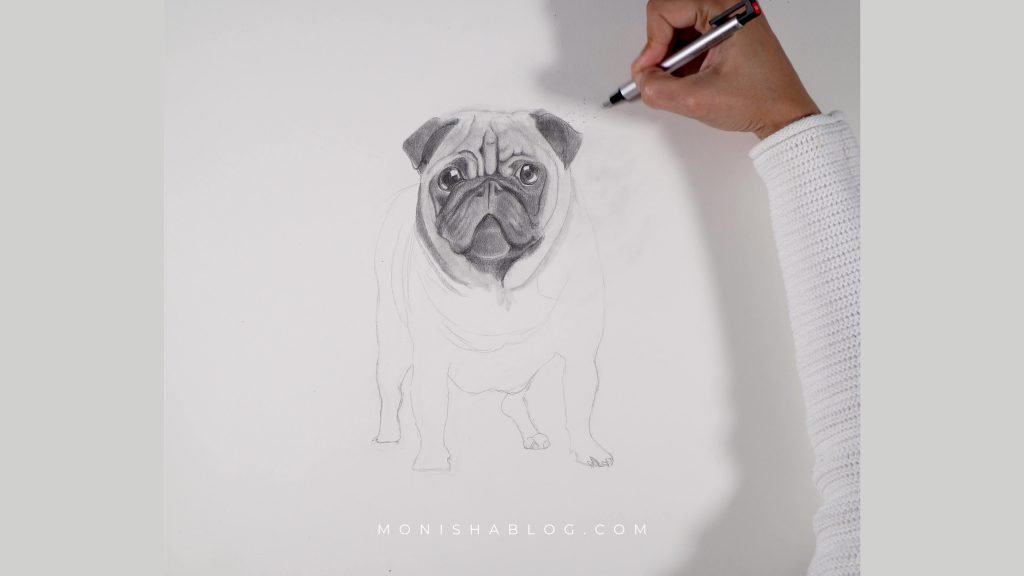
How to Draw A Pug Step 4 – Shading
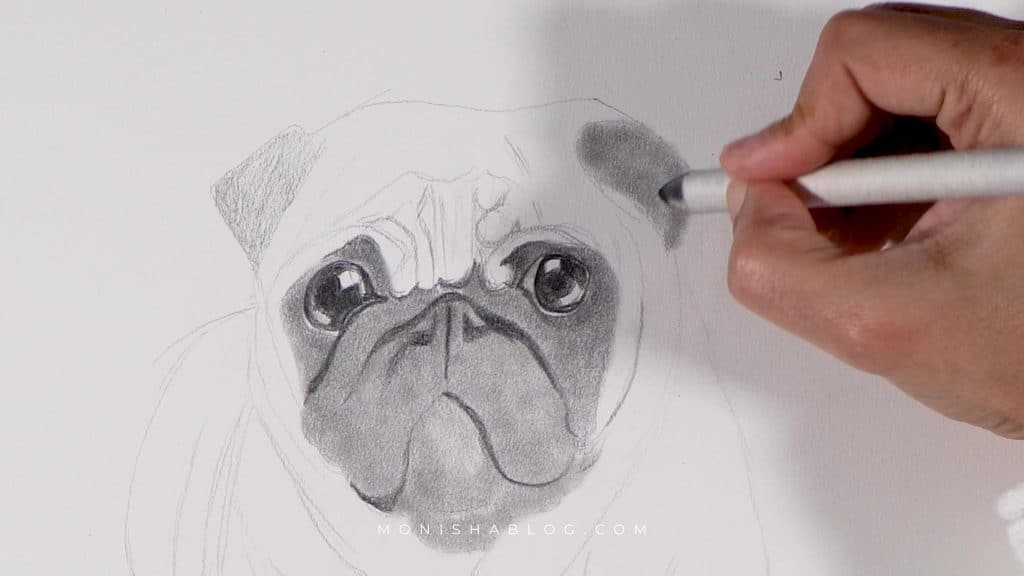
This pug has a pretty dark face and snout, but I’m going to shade in that area with light strokes. You’ll see why I used light lines for my shading in the video, even though the face is dark. When I start blending, the “color” will go at least one shade darker. If you decide you need to go darker, shade another layer and blend until you get the tone you want.
Natural Shadows

A good thing to keep in mind as you shade is where the natural shadows are. They are important!
At this point in the video, I started shading in the torso, and the difference in shade between the forelegs and the hind legs helped to place them at the right distance. The darker hind legs look further away.
Also, note that each paw is different in terms of the direction the toes are facing. Pay attention to those details as well. It might look weird at first, but it will all come together as you shade and fill.
How to Draw A Pug Step 5 – Blending
Oh, blending is fun! If you don’t have a blending stump, don’t panic. A bit of tissue or regular paper will give you similar results. Even a Q-tip will work if you hold it parallel to your work surface so that the hard plastic part doesn’t scratch your paper. The only difference is blending stumps can be sharpened to blend tiny areas as well.
Work In Sections
It helps to work in small sections. Repeat steps 2-4 in small areas, darkening, shading, and blending until your background is shaded.
It’s fun to see Norah’s worried expression beginning to fill in. She looked like she wasn’t sure I knew what I was doing, but I assured her it would be fine!
A Little Free Therapy
On a personal note: art is therapy. I actually did this project at a really low point. Something about Norah’s expression combined with the music I chose for the video had a comedic effect. That worried little face materializing over chipper and upbeat music made me realize that maybe I take life too seriously sometimes.
The answer might be much simpler than we think – like focusing on doing what you love.
How to Draw A Pug Step 6 – Erase
The humble eraser. This might be why I prefer pencil drawing. You can erase if you make a mistake! Don’t you wish all of life was like that?
As Norah took shape, there was something a little off about her hind leg. She didn’t look very steady or comfortable. This is why the outlines should be drawn lightly. They are very forgiving and easy to erase and redraw.
Erasers also come in handy for adding a highlight here and there. Norah’s wet little nose had a couple shiny spots, and I also quickly added lighter dots to create that characteristic doggie nose texture and shine with my Mono Zero. You’ll see that later on in the video.
And now, it’s time for the best part - details! Woohoo!
How to Draw A Pug Step 7 – Detail
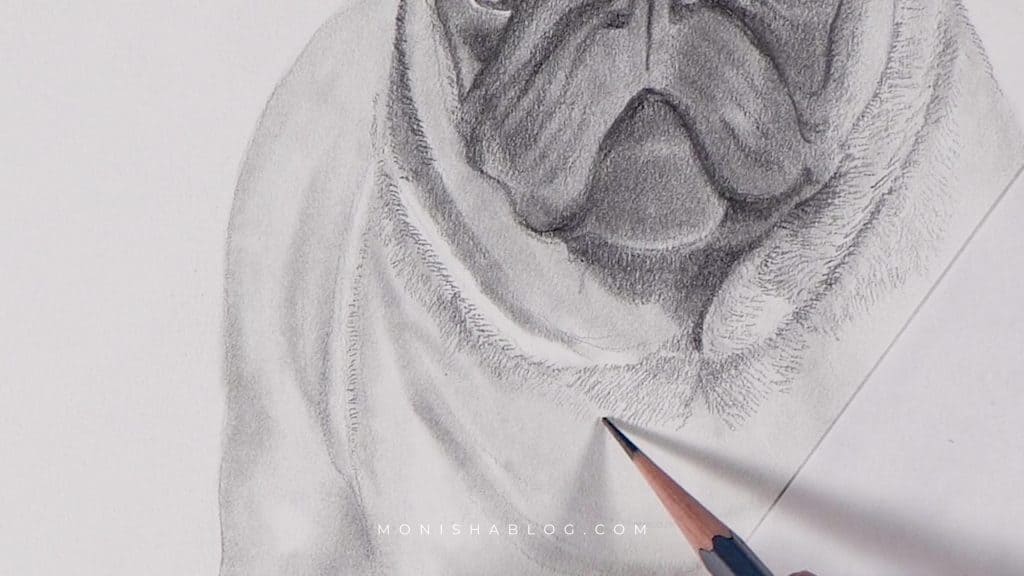
Everything we did up to this point was prep work for this moment. It’s time for the real stars of the show to make their appearance.
Okay, maybe I enjoy adding detail a little too much, but those tiny, painstaking details are what bring the entire drawing to life! That said, the thousands of little hairs on this velvety pug lady looked daunting at first! BUT, I just started at one spot and went for it.
If I did it, you can do this! The end result will be so worth it.
Keep in mind the direction the hairs are facing (refer to your photos). How long are they, how thick, and how close together are they?
As unimportant as it might seem, these little unique and almost invisible details decide the final outcome. Details make something one-dimensional come alive! Yes, I said that again for effect.
It’s just one stroke at a time. Remember, you can always take a break and come back to it until it’s all done!
Congratulations!
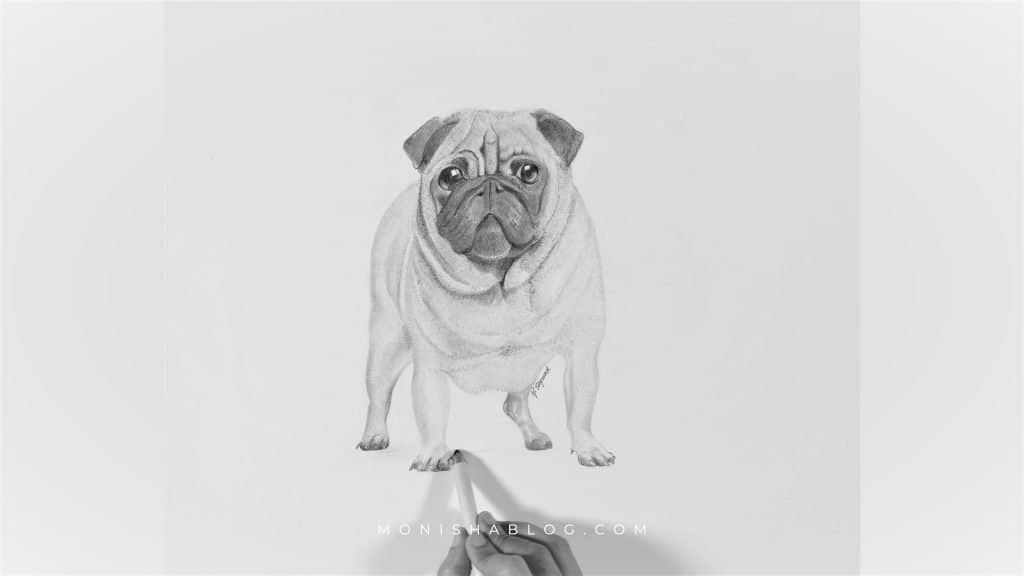
And there you have it! You drew a pug!
If this was your first time drawing something, I am so proud of you! Keep going! Like any other skill, learning to draw will just get better the more you practice.
As always, I like sharing something about the process that inspired me. I know I complained about working on Norah’s fur. I hadn’t realized how many tiny strokes it would take to do justice to her beautiful coat. But that painstaking process gave me a new understanding of the God who created all creatures, great and small. He not only designed and created every hair, but He has also numbered every hair on every head! No wonder He is jealous of His creation. I would be pretty jealous if someone tried to claim my artwork as their own after all that work!
You are God’s handiwork, created and treasured by Him.
Every time you look in the mirror, learn to love those unique details He included in your design.
You are one of a kind created for a beautiful purpose! Don’t ever forget that.
I hope you enjoyed my first-ever art tutorial. I loved having you along on the journey!
Stay tuned for more art videos and tutorials.
Looking for a unique gift or home decor? Click here for art prints, bags, COFFEE MUGS, and lots more.
See below for a few of our favorite picks.